
Safecracker is an insane difficulty set of malware analysis challenges based on a ransomware virus. The description is “We recently hired some contractors to continue the development of our Backup services hosted on a Windows server. We have provided the contractors with accounts for our domain. When our system administrator recently logged on, we found some pretty critical files encrypted and a note left by the attackers. We suspect we have been ransomwared. We want to understand how this attack happened via a full in-depth analysis of any malicious files out of our standard triage. A word of warning, our tooling didn’t pick up any of the actions carried out – this could be advanced.”
First things first, decompressing the ZIP file gets us a dump from the infected server with some files, a RAM dump, and a ‘$MTF’ file. The first thing we are gonna do is look at the files. We can do this by using a tool named Autopsy. Opening Autopsy, we can import these files.


After letting them ingest, we can begin to look through them and look for anything interesting. Starting at the top of the file types, I begin to work my way down. The first thing that pops out to me is the ‘ConsoleHost_history.txt’ file.
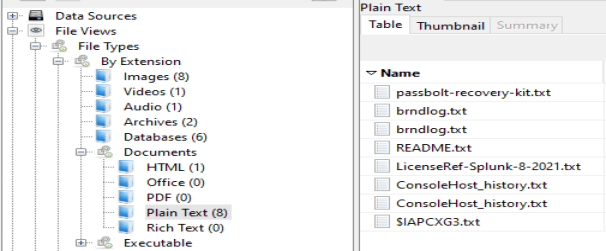
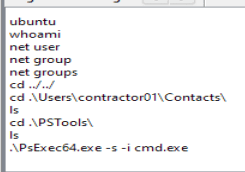
Opening it up we can see some commands that look like they come from a reverse shell. It looks like the ‘contractor01’ account was the one used for the initial access to the company server. This also shows us the command that was used to escalate privileges.
Going down to the ‘.exe’ section, we can see one program. This may be the malware itself. We will save this for a bit later.

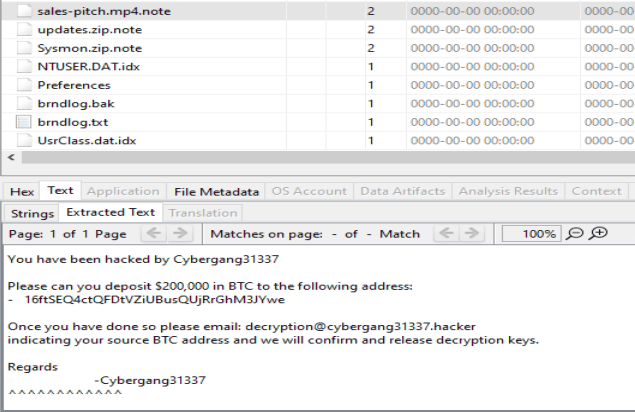
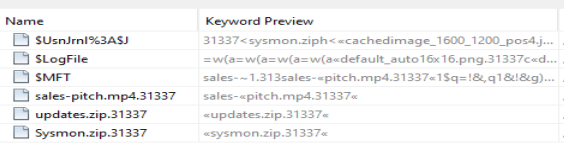
If we continue to look through the files we can also find the ransom note.
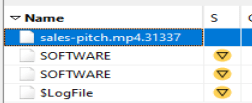
If we search by file size instead of by file type, we find this file with an odd extension. This may be the extension the encrypted files are given by the malware.
If we search Autopsy for this file extension, we do not find much. It does look like there are more in the ‘$MFT’ file, which is the Master File Table.
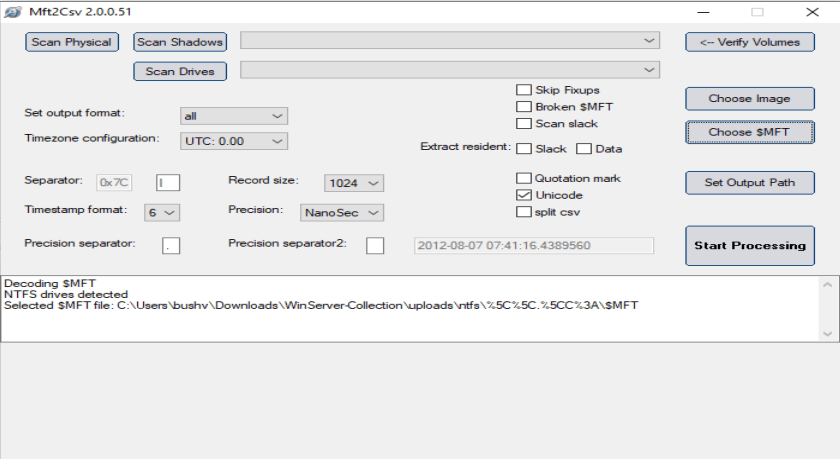
In order to look through the ‘$MFT’, we are going to have to use another tool. The one I chose was ‘Mtf2Csv’, but there are a lot of options. We can load the ‘$MFT’ file into the program and begin processing.
This gives us a lot of ‘.csv’ files we can look through. I open up the main one named ‘Mft.csv’ and do a search for ‘.31337’ Doing this gives me 34 results, but when I enter this answer in, it is incorrect.
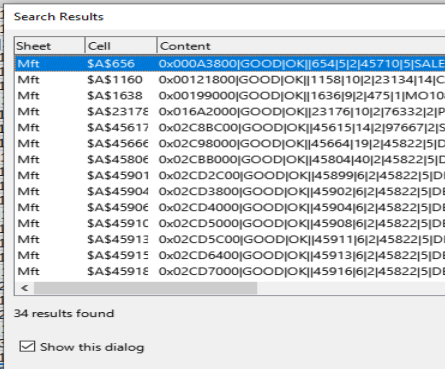
Looking closely through the files we can see we have an imposter. This file was not actually encrypted, but it has ‘.31337’ as part of its time metadata. Also looking through these files, we can see that no ‘.exe’ were encrypted. That gives us the answer to Task 13.

Now that we have that figured out, we can move onto the malware itself. To extract the malware from Autopsy, we can right click it and select extract.

The first thing I am gonna do is open it up in Detect It Easy to check it out. It looks like it was compiled on Debian which is odd. We can get the compiler version from this.
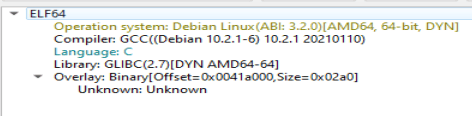
Since the executable was compiled on Debian, it is probably an ‘.elf’ file. Opening it up in a hex editor, we can see we are correct.

Obviously, you cannot just run ‘.elf’ files on Windows, so there must be something else there. If we go back to Autopsy and look through the other ‘ConsoleHost_history.txt’ file we can see WSL was installed, which is how the file was run.

Let’s open the executable up in Binary Ninja. Looking through the main function the first thing I notice is ‘memfd_create’ and ‘execl’. Looks like this program is a dropper for a second stage. We can also see what the name of the process the file is run as here as well as the name of the ‘memfd_create’ the packer uses.
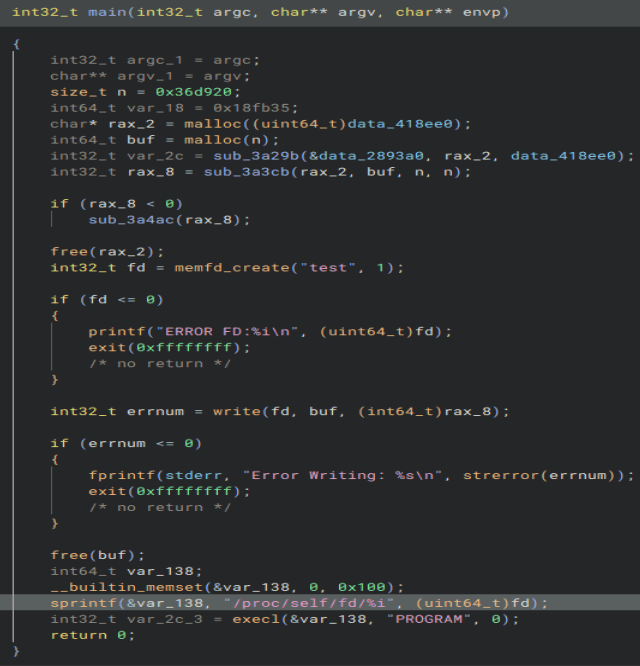
Looking through some of the data sections used in the main function, we find one that is extremely long. This is probably the second stage. It’s header is not one of an executable, so it is probably obfuscated in some way.

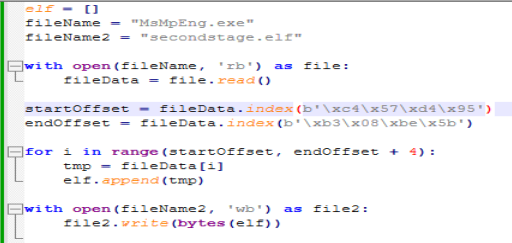
Using this script we can write it out to a separate file.
If we follow the function that uses this data, we find this function.
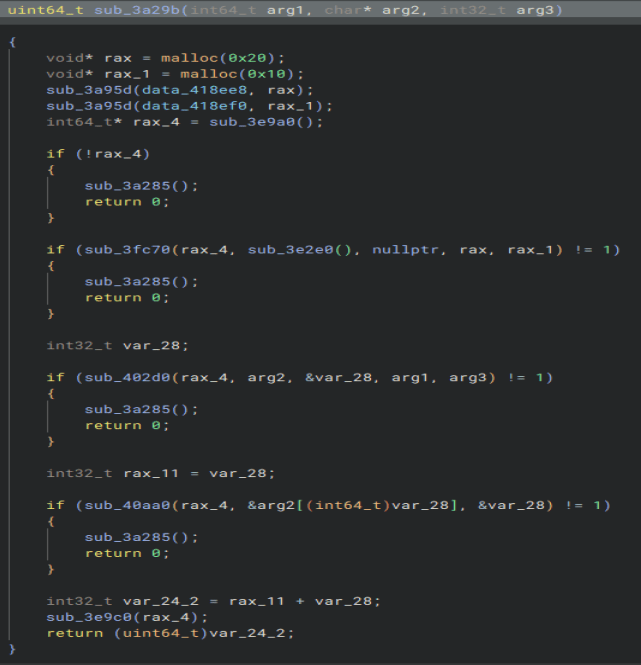
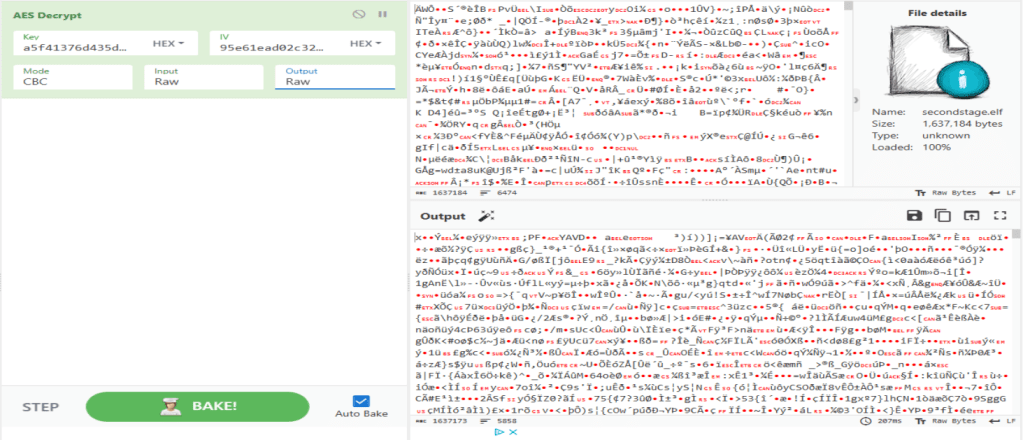
At the top we can see we pull two more parts of data out of the binary with very interesting sizes. Those are the size of the key and IV of ‘AES-256-CBC’. We can see references to ‘crypt’ in the binary so this is highly likely how it is encrypted.

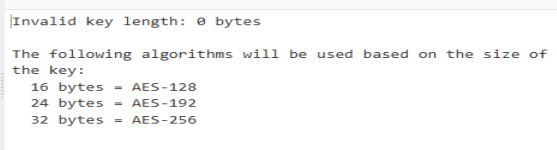
If we put the file into CyberChef with the key and IV from the binary, we can decrypt the file.
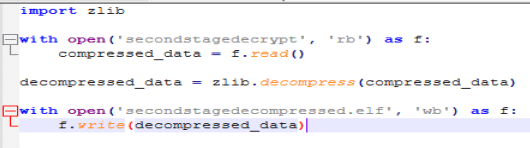
This does not give us a file header that is executable either. A new tool called Magika came out that detects file types, so I give it a go. I drag the file in and get this. Looks like it is zipped with ZLIB.

Using this simple script we can unzip the file.
Opening that up in a hex editor, we finally get our executable.

Time to open it up in Binary Ninja. Looking at the main function we get the answer to what is the ‘XOR’ key and what folder the malware targets. Let’s look through some of these other functions and see what they hold.

Opening up the first function, we see what string is printed out when the program is debugged.
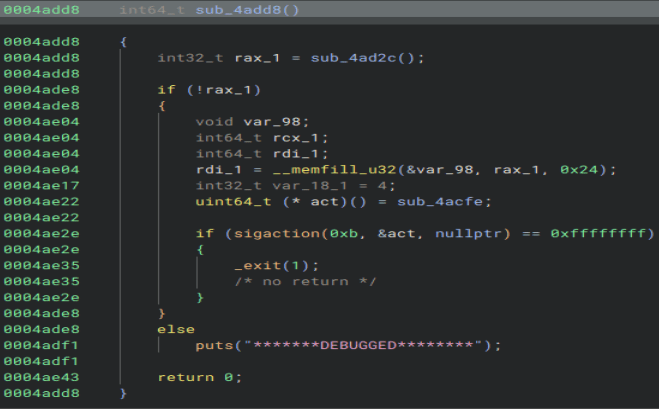
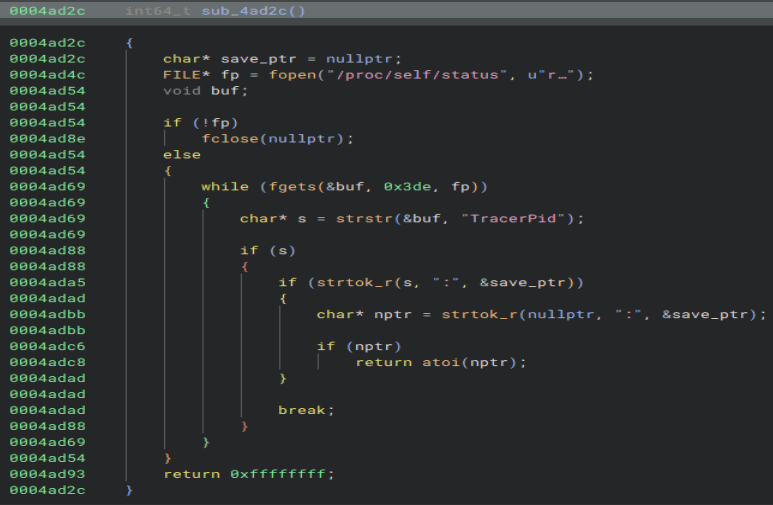
We can look through the function at the top to see what check they use to detect a debugger. Here we can find both the file that is opened and the string that is checked for.
Next we need to find what syscall is used to find files in a directory. Here we can see the function is called, but it is not the right answer.
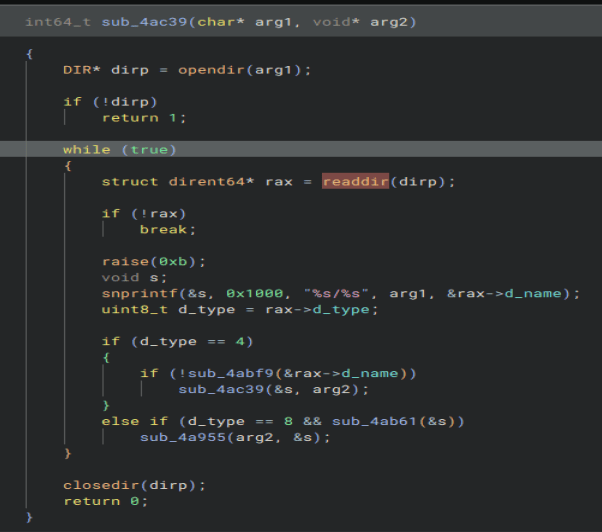
Looking at the manpage for the function we can see there is a function named ‘getdents2’ that supersedes ‘readdir’. That is also not the answer.

Going to ‘getdents2’ man page, we can see there is another name for the function, assumedly the 64-bit version, that is the correct answer.

Now we gotta do the same thing for the syscall that deletes the original files. Here is the function that the executable uses to delete files.
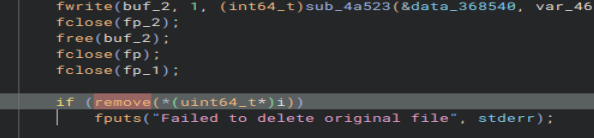
Going to the manpage for it, we can see ‘unlink’ is used to delete files. That was much easier than the last one.

Now, we need to find the who the attacker bought the malware from. Scrolling though the strings and I found this. Seems the author was a little sloppy. It is also interesting it is in a folder named ‘LockPick3.0’ as that was a previous challenge. Maybe a fun little Easter egg.

And finally, we need to check the contents of the ‘.comment’ section. For some reason Binary Ninja had some trouble decompiling this executable and there is no ‘.comment’ section. No fear though, we can open the executable in Ghidra and find it easy.

This challenge took me by far the longest to do. I did not like the syscall questions as it took me some guessing to get the right answers, but maybe I was doing something wrong. I did like that I got to try some new tools such as Autopsy and Magika, as well as learning how to read through a ‘$MFT’ file. Overall it was very fun. Thanks for reading and happy reversing!

Leave a comment